 |
||||||||||||||
Maintenance: 1957 Plymouth Belvedere Convertible
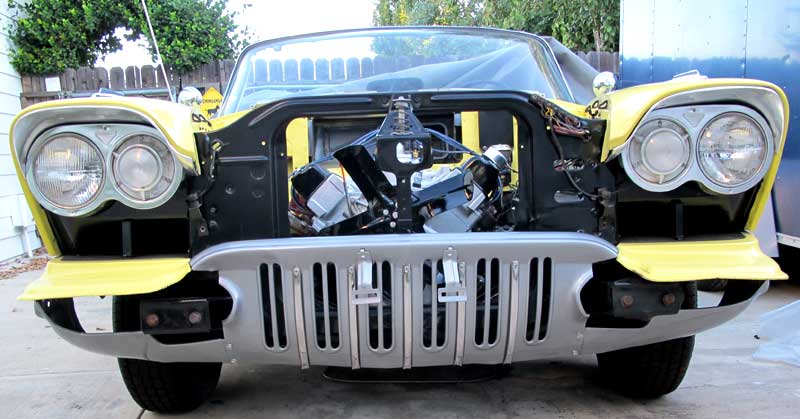
June 22, 2010 the Plymouth arrived from Salem Indiana.
Plymouth Belvedere convertibles were only produced from 1957 to 1959.
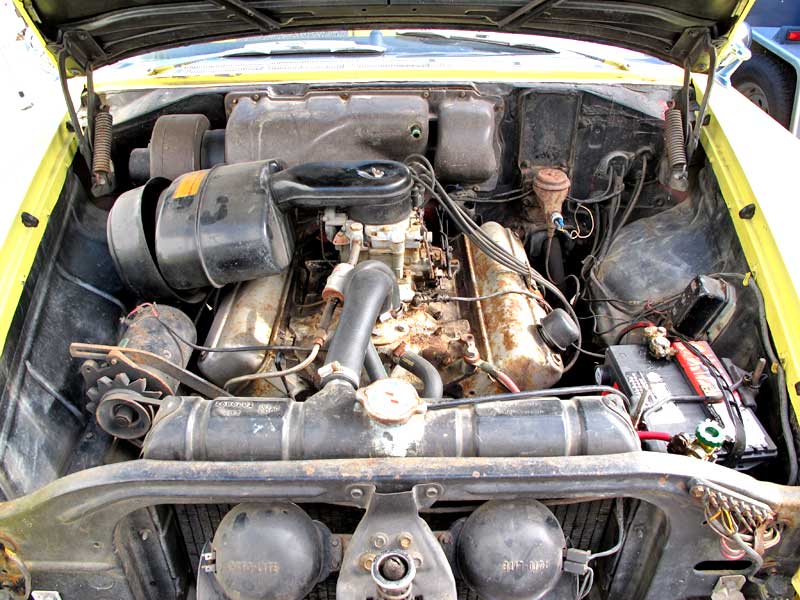
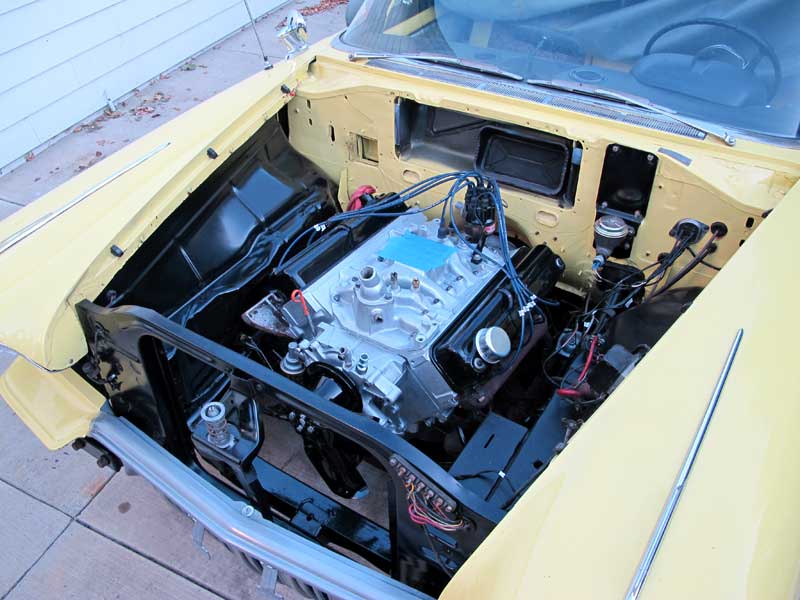
Engine compartment when it arrived June
2010
JUNE 2010
- 6/26/10 De-greased and pressure washed the engine compartment and underside of vehicle
- 6/27/10 Changed oil & filter, painted oil filter can orange, greased chassis. (last oil change 1994 according to the door sticker)
- 6/29/10 Replaced air filter and fuel filter
JULY 2010
- 7/2/10 Cleaned and packed front wheel bearings, installed new grease seals
- 7/4/10 Bead blasted and painted 5 rims (wheels) gloss black
- 7/5/10 Bead blasted and painted valve covers gloss black
- 7/5/10 Mounted 5 new American Classic tires with metal stems
and balanced
(205/75R14 [radial] 2 ½ whitewall ) - 7/6/10 Installed valve covers with new gaskets
- 7/7/10 Installed overhauled driveline (Replaced rear universal joint and front ball & trunnion joint, and balanced driveshaft)
- 7/7/10 Installed new front shocks
- 7/13/10 Installed new 180 degree radiator thermostat
- 7/14/10 New upper ball joints, new upper torsion arm bushings, and manual steering box rebuilt.
- 7/19/10 Complete brake job; replaced master cylinder, all wheel cylinders, brake hoses and brake shoes. Painted backing plates and metal plate under master cylinder black
- 7/20/10 Aligned front end after suspension work completed
- 7/27/10 Rear pinion seal replaced
- 7/28/10 Replaced oil in rearend and fixed some engine oil leaks
- 7/28/10 Replaced ignition key core, fixed blinkers, installed new electric temp sending unit - it works...
- 7/29/10 Touched up yellow paint
- 7/30/10 Transmission serviced; filter and fluids changed - (plenty of clutch material left - worked on in 1983)
- 7/30/10 Changed oil SAE 10-30 again while fixing leak
AUGUST 2010
- 8/1/10 New; fuel pump, fan belt, spark plugs, spark plug wires, distributor cap and rotor
- 8/2/10 Leave for Hot August Nights in Reno.....
- 8/8/10 Returned from Hot August Nights - with no problems! Yahoo!!!
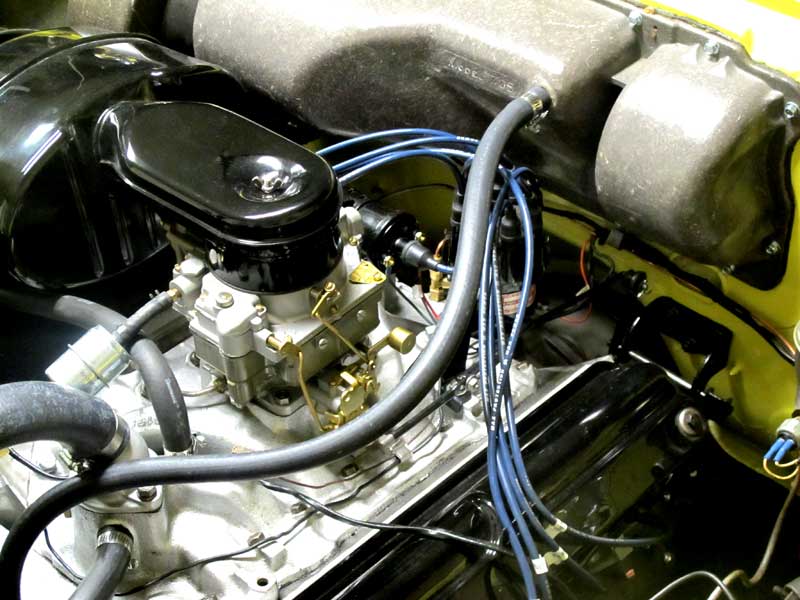
- 8/16/10 Carburetor off for complete concourse correct show quality overhaul.
- 8/17/10 Radiator routed out and heater core tested and cleaned.
- 8/20/10 Working on cleaning up the engine compartment
- 8/22/10 Cleaned, primed and painted the firewall yellow
- 8/23/10 Cleaned, sanded engine compartment and painted satin black.
SEPTEMBER 2010
- 9/4/10 Intake manifold re-installed
- 9/4/10 Front gravel pans painted metallic silver
- 9/4/10 Painted several engine parts Ultra Black (air cleaner, fan, pulleys, etc.)
- 9/5/10 Installed new water pump, thermostat housing, stock temp sensor and painted frame with Por-15
- 9/5/10 Installed front gravel pans, buffed, and 5 vertical stainless strips
- 9/14/10 Heater water control valve rebuilt and installed
- 9/19/10 Cleaned rust from inside front bumper and painted silver, re-installed some small parts in engine compartment
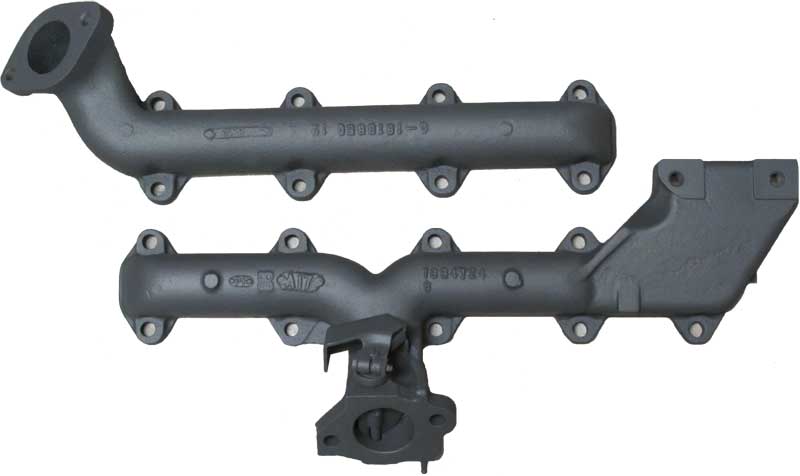
- 9/19/10 Removed exhaust manifolds to replace with ceramic coated manifolds. (Major issue - broke off several old studs)
Cap's Brite Hot Coatings
www.capsbhc.com
Ceramic coated in
cast iron color $163
- 9/21/10 Chromed rear trunk emblem - looks good
- 9/25/10 I had to take the heads off to remove the old exhaust
manifold studs and install new ones. Intake manifold had to come off
again.
Good thing! In the process I found 2 bent pushrods. One accounted for a click I have been hearing. I presume after the engine had been sitting for a long time and they started it up in Salem Indiana a couple of intake valves were stuck due to old varnish which bent the pushrods. Anyway new pushrods are on their way and new studs are installed. - 9/27/10 Replaced the fan, cleaned and painted the generator. Brushes are 90%. Old fan was really chewed up..
OCTOBER 2010
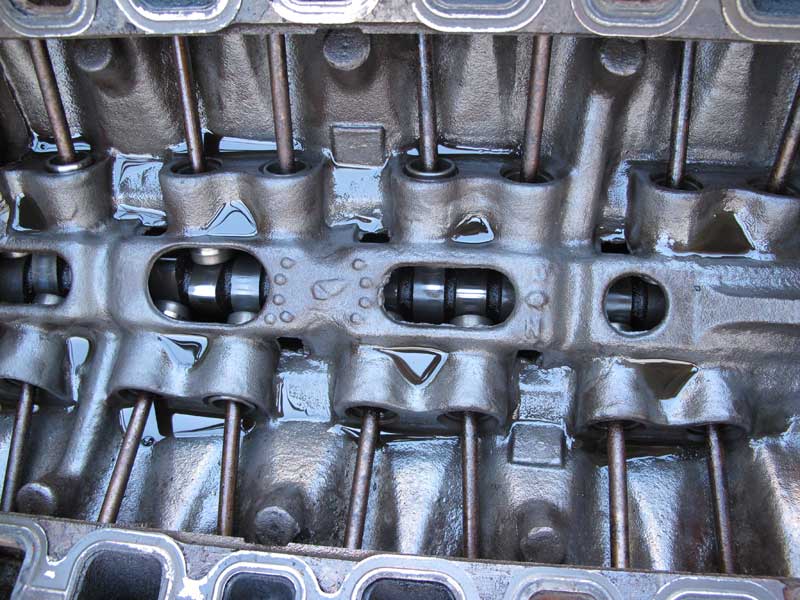
- 10/8/10 Installed heads and 16 new Melling push rods. Adjusted the valves cold.
- 10/9/10 Installed radiator, heater core, blower fan, generator, ceramic coated exhaust manifolds and horns.
- 10/10/10 Painted inside of hood
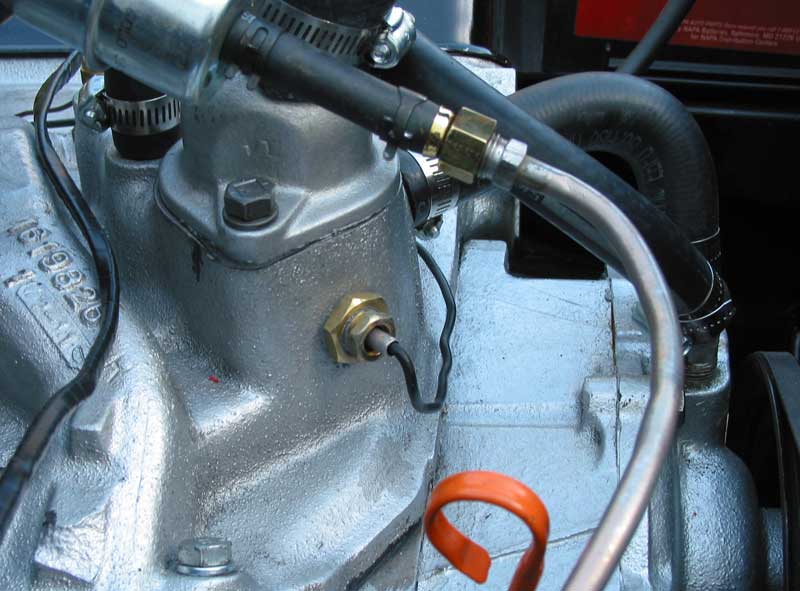
- 10/11/10 Had a machine shop drill and tap a hole ($35) in the intake manifold under the thermostat housing for the MOON gauges temperature sending unit. The wall is over 1/4" thick and the fitting is tapered pipe threads for a tight fit.
- 10/15/10 Installed intake manifold and rebuilt carburetor.
- 10/30/10 painted the inside of the hood satin black. Worked on miscellaneous issues and wiring.
|
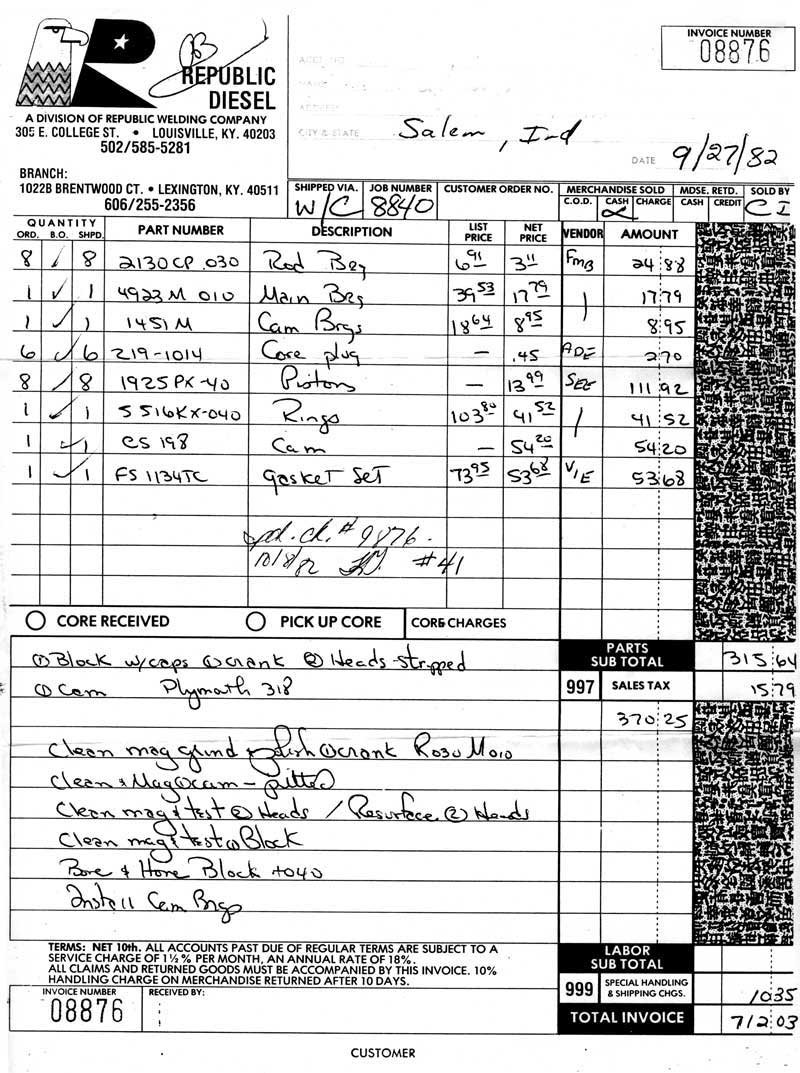
GOOD NEWS: previous owners son said the
engine was overhauled in 1982 so it has 10,000 miles on it.
What in the Power-Pak Package?Original Power-Pak parts indicated by an "A" at the end of the part number.
In a 1957 Hot Rod Magazine test a 57 Plymouth did 0 to 60mph in 9.6 seconds with the 301 Power-Pak engine.
NOVEMBER 2010
DECEMBER 2010
To polarize a generator connect all wires to the regulator,
connect the battery (negative ground) with the engine off. |


|
home || family || art || friends || fun || sites || contact copyright © 2010 by Ron Hilbert, all rights reserved |